


Torta delle rose di Iginio Massari
un dolce senza tempo

Eng. below
Ricordo ancora con affetto quei giorni di oltre vent’anni fa, quando la Torta delle Rose era un vero must tra i lievitati. Preparare una brioche in casa voleva dire quasi sempre scegliere proprio lei, con il suo profumo invitante e l’aspetto elegante che portava un tocco di festa anche nelle giornate più semplici. Mia mamma, le persone a me vicine e io stessa ci mettevamo sempre d’impegno per farla, come se fosse un piccolo rituale che univa tutti. Oggi, però, il mondo dei lievitati si è allargato tantissimo: ci sono talmente tante ricette e novità che ogni volta si finisce per voler provare qualcosa di nuovo.
Però, quando una cara amica mi ha chiesto di prepararle la Torta delle Rose, il suo dolce preferito per le feste, non ho potuto dire di no. Era l’occasione perfetta per tornare a un sapore che per anni ha accompagnato i momenti più belli. Prepararla è stato come ritrovare un vecchio amico: accogliente, familiare, pieno di ricordi.
Con gli anni, la ricetta si è un po’ trasformata, seguendo il nostro desiderio di migliorare. Oggi preferisco tempi di lievitazione più lunghi, meno zucchero e ingredienti freschi come la pasta d’arancia fatta in casa, che aggiunge un profumo meraviglioso. Ma la cosa più bella è stata condividere questa esperienza con mia figlia, che in casa è la vera esperta di lievitati. Insieme ci siamo affidate alla ricetta del maestro Iginio Massari, modificandola qua e là per darle un tocco personale.
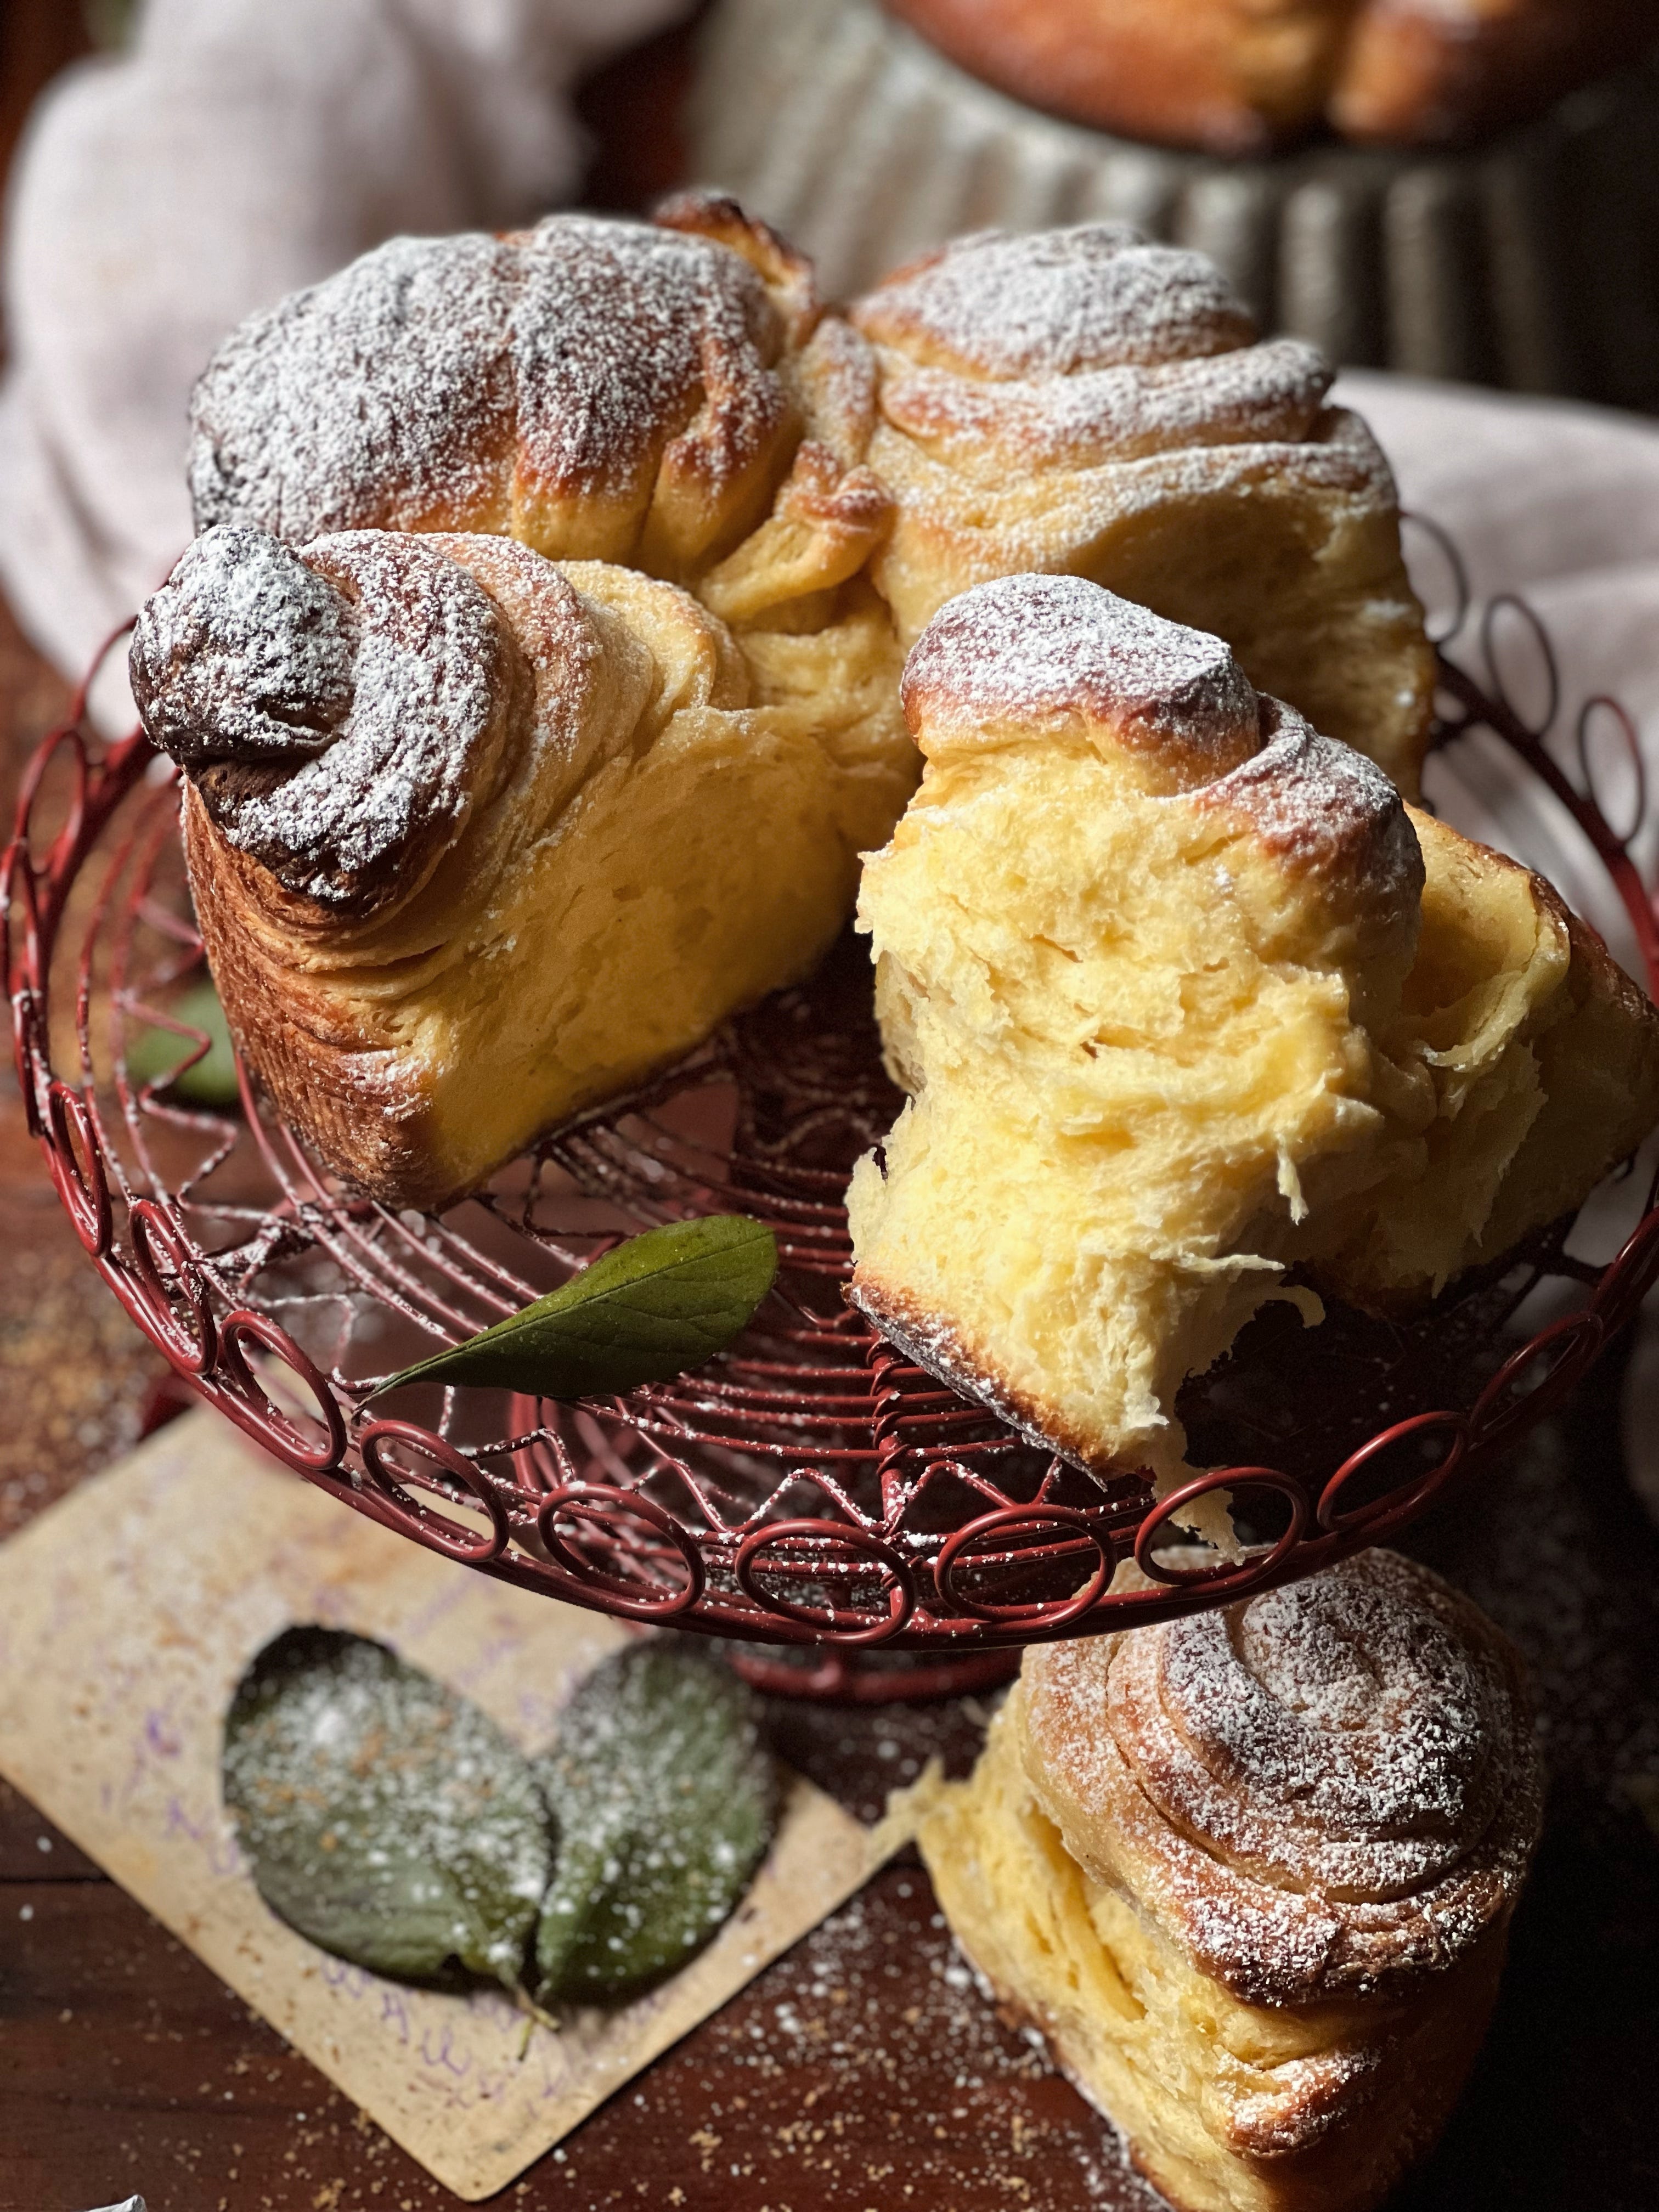
E poi, che dire del momento della colazione con la Torta delle Rose appena sfornata? Una vera coccola. La sua morbidezza è qualcosa di unico: ogni fetta sembra una nuvola che si scioglie in bocca. L’impasto, leggermente filante, è un abbraccio soffice e avvolgente. Il ripieno è dolce al punto giusto, con il burro che si fonde con il profumo fresco e intenso dell’arancia. Ogni morso è una festa per i sensi, un mix di fragranze calde che riempiono la casa e il cuore. E la felicità della mia amica, quando ha assaggiato il dolce, è stata la ciliegina sulla torta.
La storia della Torta delle Rose
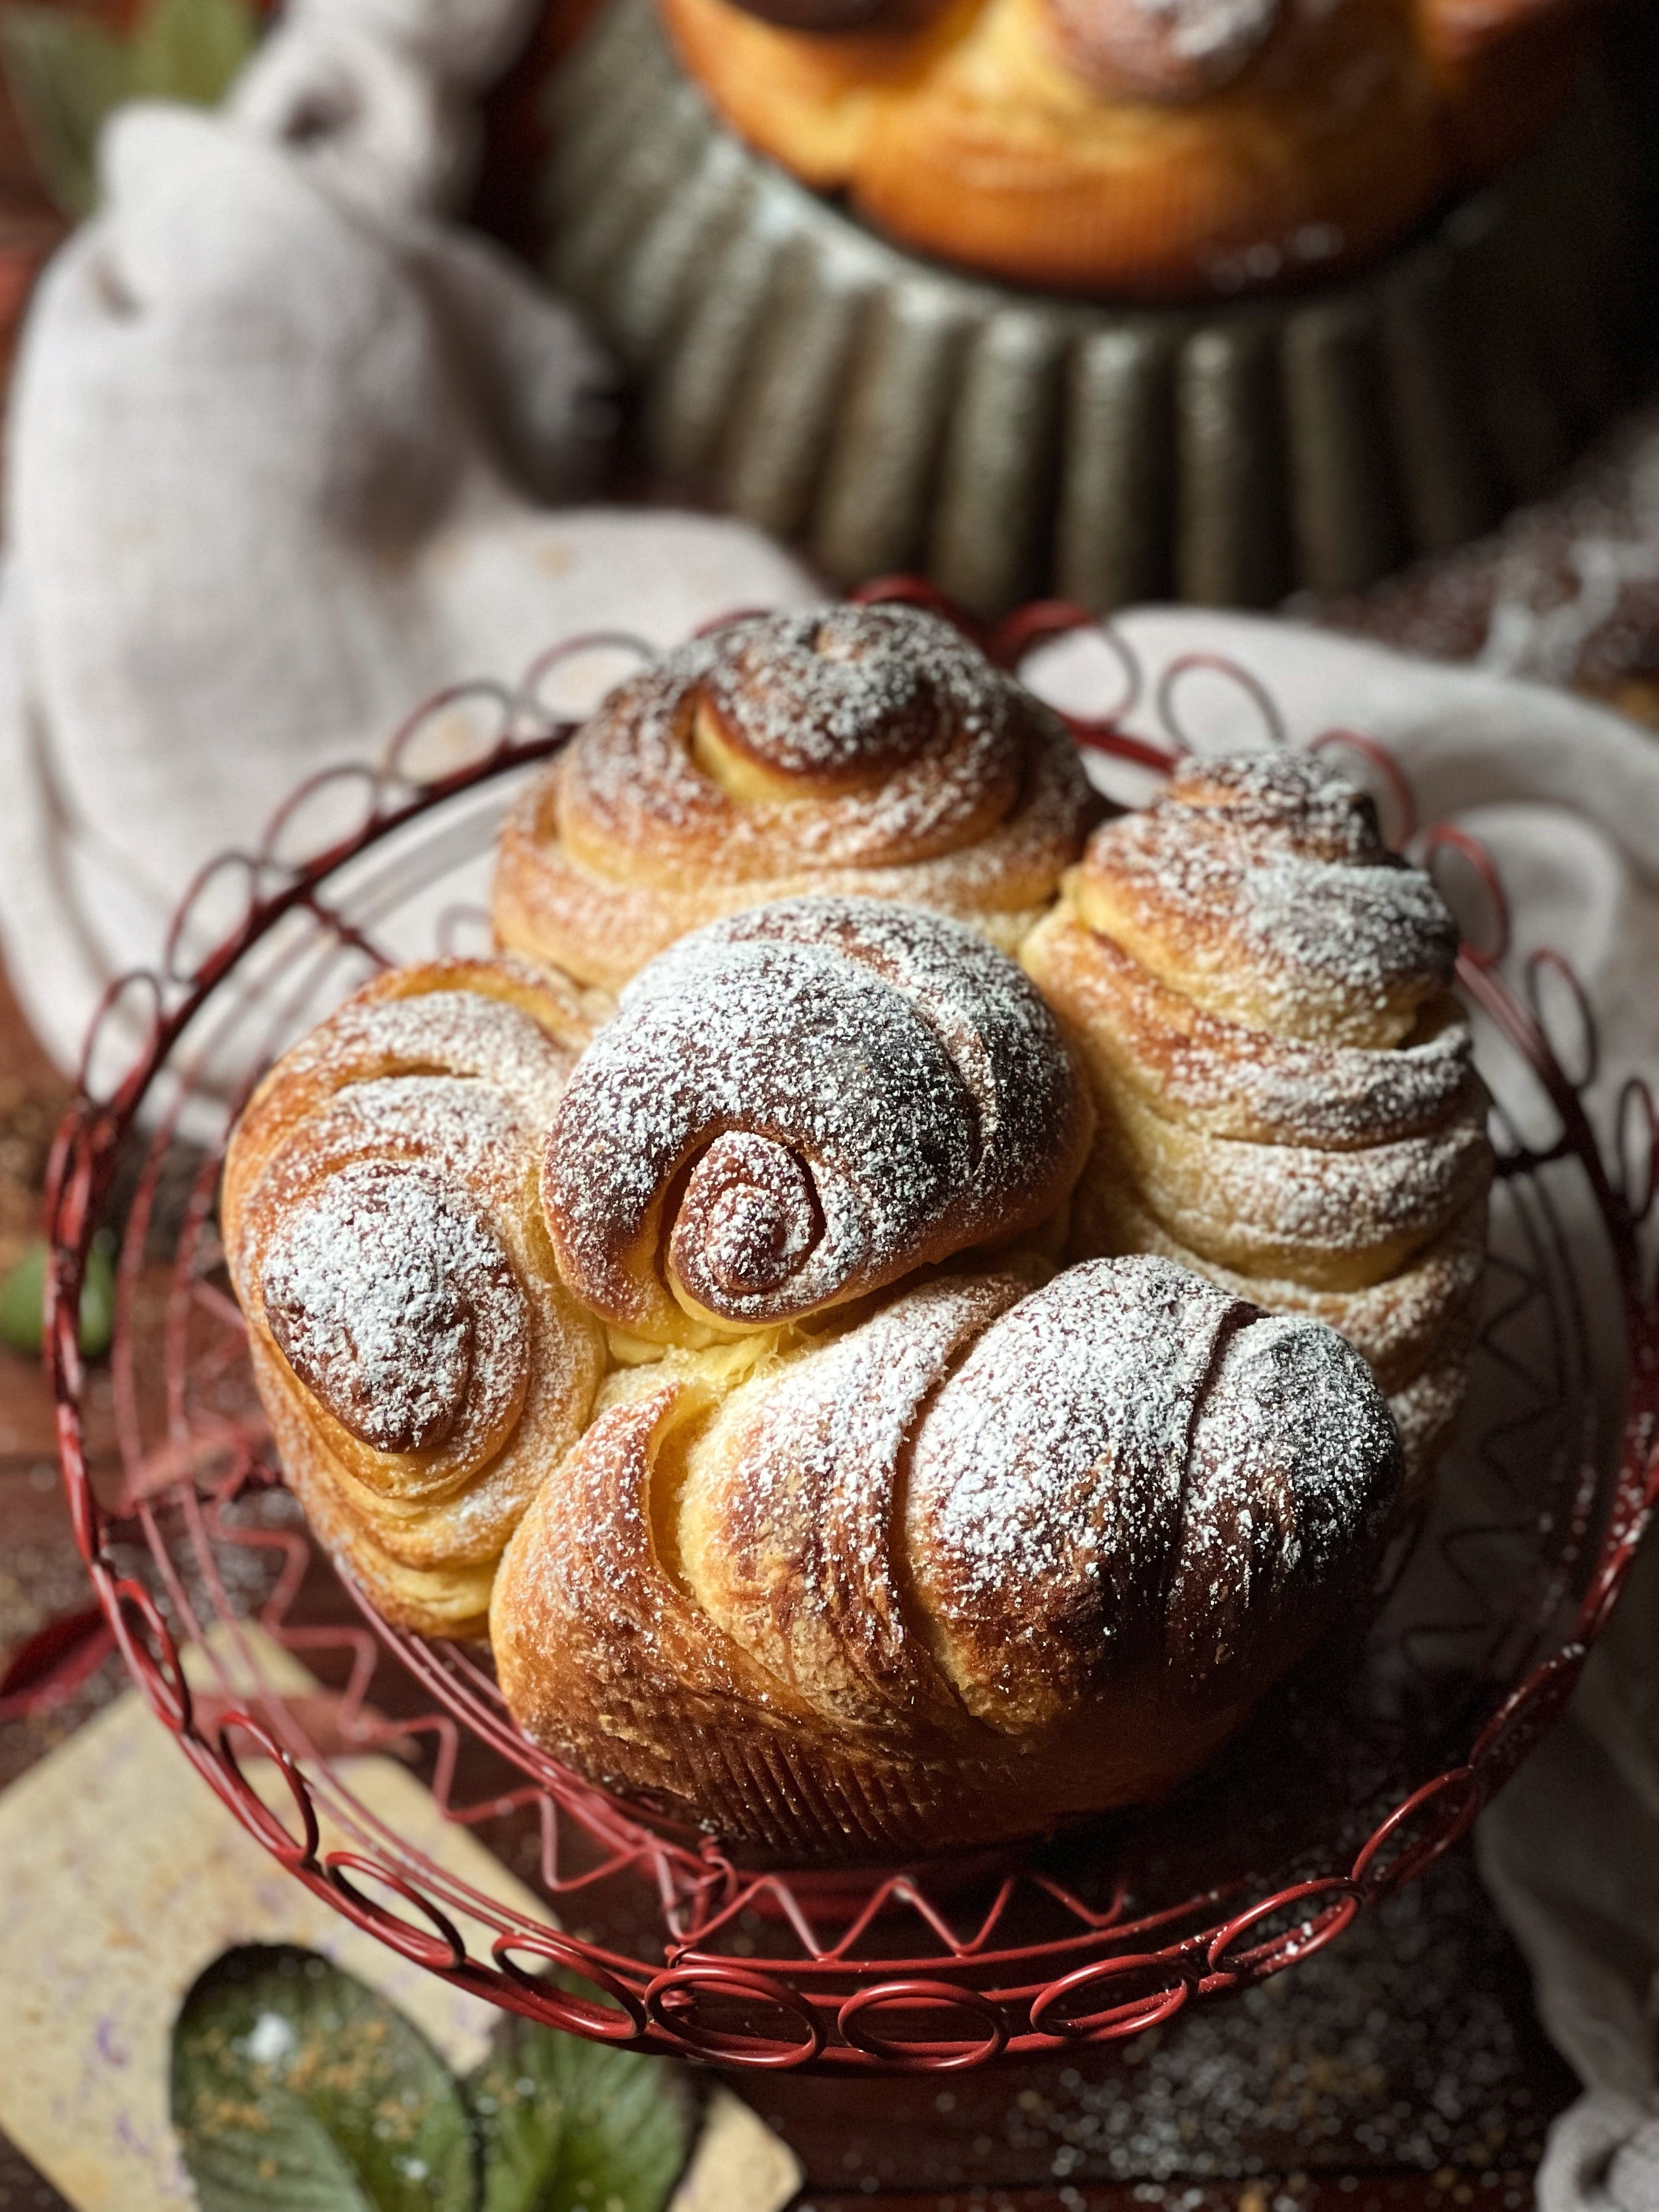
La Torta delle Rose ha radici antiche, è nata alla corte dei Gonzaga di Mantova. La sua forma — quei rotolini di pasta lievitata disposti come un bouquet di rose — era un omaggio alla bellezza e all’eleganza. Si racconta che fu creata per celebrare le nozze di Isabella d’Este, una donna simbolo di raffinatezza e cultura.
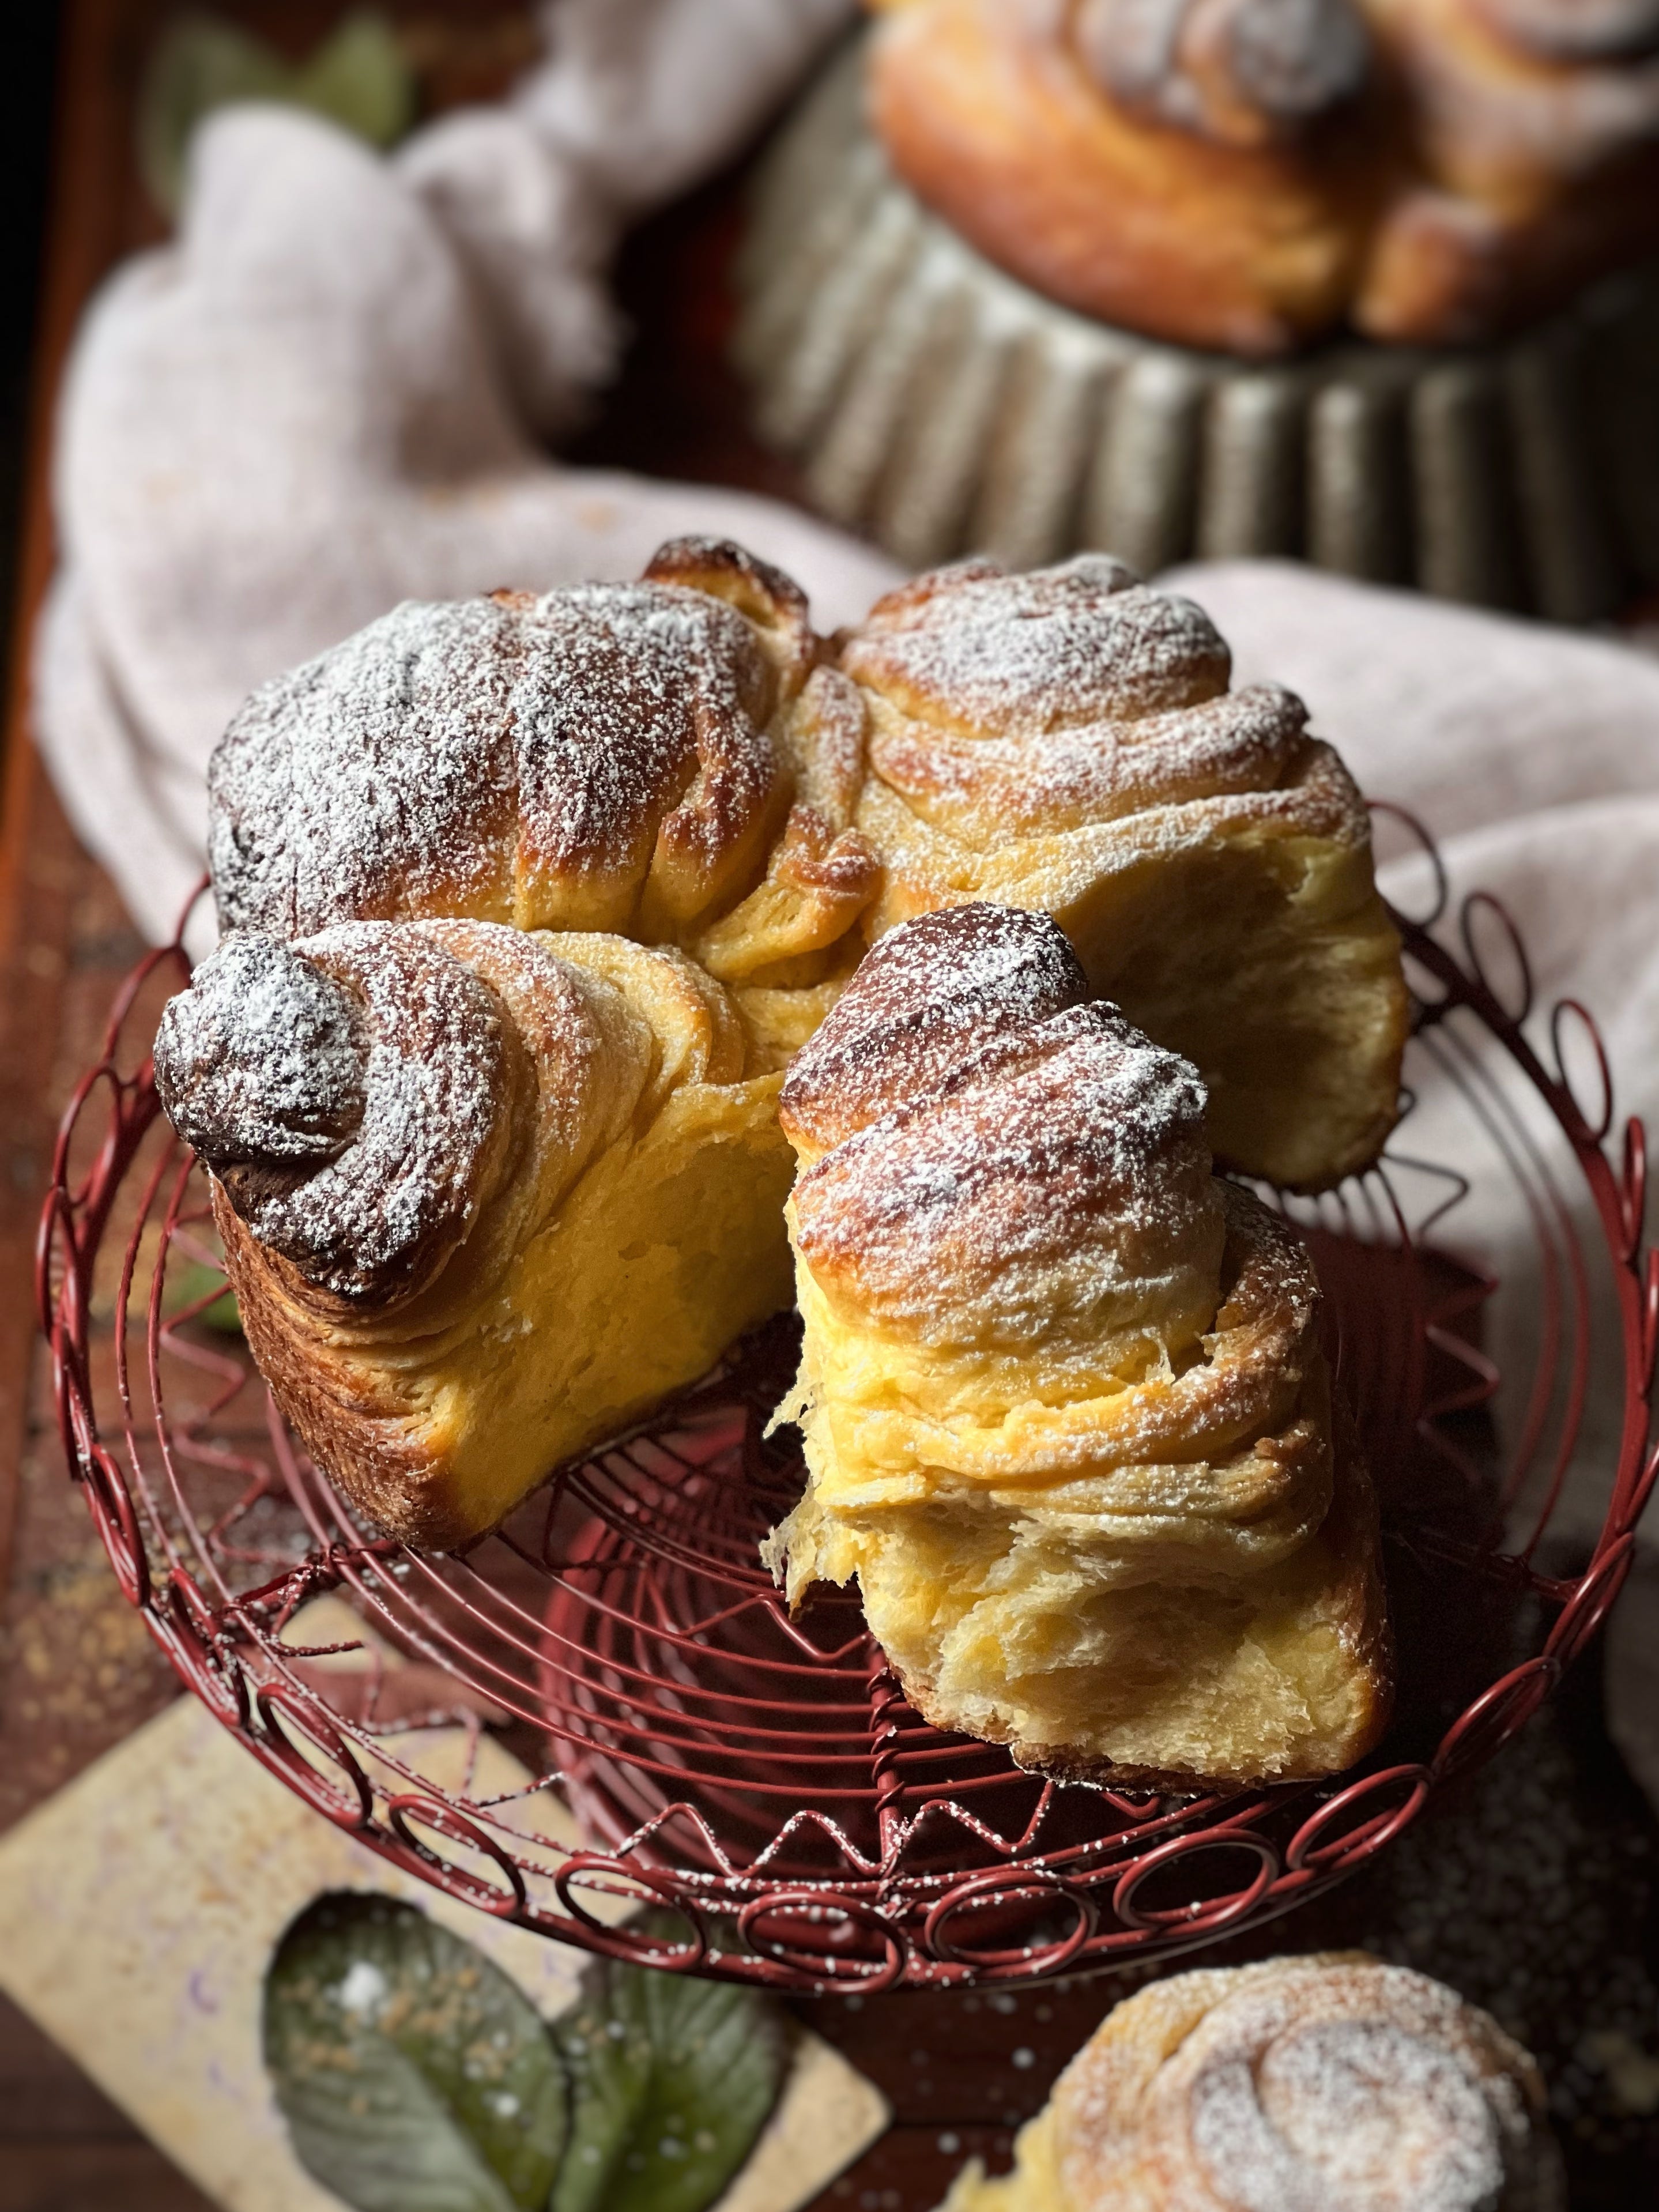
La ricetta tradizionale prevede un impasto soffice, simile a quello della brioche, arricchito da una farcitura di burro, zucchero e, a volte, crema o marmellata. Una volta cotta, la torta sprigiona un profumo irresistibile, quello che ti fa venire voglia di mangiarla subito, ancora calda. Il sapore? Un equilibrio perfetto tra la dolcezza delicata del ripieno e la fragranza dorata dell’impasto, con quel tocco burroso che ti conquista al primo morso.
Un dolce senza tempo
La Torta delle Rose è un classico che non passa mai di moda. Non importa quanti dolci nuovi proviamo, lei resta sempre speciale, capace di conquistare tutti con la sua semplicità e il suo gusto autentico. Prepararla vuol dire portare avanti una tradizione e creare nuovi ricordi da condividere con le persone che amiamo.
Tabella di marcia
Giorno 1
Ore 7.00: primo impasto
Ore 11.00: secondo impasto
Ore 15.00: terzo impasto
Ore 19.00: quarto impasto
Giorno 2
Ore 13.00: sfogliatura e formatura
Ore 18.00: cottura
Giorno 1
Primo impasto
4 g di lievito madre secco (o 8 g lievito di birra fresco)
100 g di farina forte (14 g di proteine)
50/60 ml di latte
Unite tutti gli ingredienti e impastate a mano per dare forma ad un impasto liscio ed omogeneo (a me sono serviti 60 ml di latte, dipende molto dal grado di assorbenza della farina).
Trasferite il panetto in un contenitore e coprite con pellicola. Fate lievitare fino al raddoppio, consiglio nel forno con luce accesa (ad una temperatura di 22° sono necessarie 4 ore, se 26°, 3 ore).
Secondo impasto
- tutto il primo impasto
30 g di uova
50 g di farina forte
Con una forchetta sbattete leggermente l’uovo, poi unitelo alla farina e al primo impasto.
Lavorate gli ingredienti fino ad ottenere un impasto liscio ed omogeneo.
Fate lievitare nel forno con luce accesa fino a quando triplica il suo volume (ad una temperatura di 22° sono necessarie circa 4 ore, a 26° circa 3 ore).
Anche in questo caso ci vorranno 2/3 orette ad una temperatura di circa 26 gradi.
Terzo impasto
- tutto il secondo impasto
20 g di uova intere
16 g di tuorlo
15 g di burro a pomata
15 g di zucchero
50 g di farina forte
Aggiungete tutti gli ingredienti al primo impasto e lavorate gli ingredienti fino a formare un impasto liscio e omogeneo.
Fate lievitare fino a quando al triplicare di volume.
Quarto impasto
- tutto il terzo impasto
800 g di farina forte
250 g uova
150 g tuorli d’uovo
160 g zucchero
120 g acqua
200 g burro a cubetti 2x2 cm
12 g sale
40 g miele d’acacia
100 gr di pasta d’arancio (oppure scorze d’arancio candito e frullato con 1 cucchiaio di acqua)
1 bacca di vaniglia
Prima di cominciare
Per prima cosa preparate il composto aromatico mescolando miele, pasta d’arancio, bacca di vaniglia (potete prepararlo anche il giorno prima). Riponete in un vasetto e conservate in frigorifero, si conserva per un paio di settimane).
In un contenitore pesate le uova e i tuorli, sbattete con una forchetta per amalgamare.
Pesate lo zucchero, il sale, e tagliate a cubetti il burro morbido (dev’essere a pomata).
Preparazione dell’impasto
Inserite all’interno dell’impastatrice il terzo impasto a cui aggiungete la farina, l’acqua ( cominciate con 100 g) e i 2/3 delle uova. Impostate una velocità media (non più di 3).
Una volta incorporato bene il tutto aggiungere lo zucchero semolato e continuare la lavorazione.
Dopo circa 10 minuti l’impasto prende bene corpo, quando risulta liscio, aggiungete il restante composto di uova in più riprese.
Quando l’impasto risulta liscio e ha formato la maglia glutinica unire il composto aromatico e poi il burro a cubetti. Per incorporare il burro procedete aggiungendo un cubetto alla volta e non aggiungete il successivo fino a quando non si è ben incorporato. Io fermo la macchina e lo spalmo direttamente sull’impasto così da evitare che finisca sul bordo della ciotola.
Quando tutto il burro è stato incorporato aumentate la velocità della macchina e fate andare fino a quando l’impasto si stacca dai bordi. Verificate l’incordatura (con le mani umide tirate una parte di impasto e se non si spezza è incordato).
Trasferite limato su mi piano leggermente infarinato e formate un panetto. Trasferite in un contenitore oliato e sigillate con il coperchio. Fate lievitare un’ora nel forno con luce accesa (o t.a. se fa caldo), poi trasferite in frigorifero. Maturazione in frigorifero di 15/16 ore.
Giorno 2
Per la sfogliatura
200/300 g di burro a pomata + zucchero per spolverare
Procedimento pezzatura e formatura
Togliete dal frigorifero l’impasto e lasciate acclimatare per circa 30 minuti.
Su un pialo infarinato stendete l’impasto in un grande rettangolo dello spessore di mezzo centimetro.
Con le mani stendete sulla superficie il burro a pomata, io ho abbondato coprendo bene tutta la superficie (ho usato circa 28g.
Spolverate la superficie con lo zucchero.
A questo punto potete decidere di procedere in due modi:
Arrotolate sulla parte più lunga creando un lungo salsicciotto, in questo caso con un filo si spago tagliate delle rondelle di 5 cm.
Tagliare strisce di 5 cm di altezza e poi arrotolarle su se stesse (io ho proceduto in questo modo).
Trasferite le rondelle in due teglie da 22 cm di diametro, una affianco all’altra. Coprite la superficie con la pellicola.
Trasferite in forno con luce accesa (modalità lievitazione nel mio caso) ad una temperatura di 26°/28° fino al raddoppio, circa 4/5 ore.
Cuocere a 170°C per 30/35 min per 500/600gr. Quando la superficie è dorata, coprite con un foglio di alluminio e terminate la cottura.
Sfornate e lasciate raffreddare prima di spolverare con zucchero a velo.
Conservare in un sacchetto per alimenti per un paio di giorni.
Prima di gustarla è da scaldare così da portene apprezzare appieno la morbidezza e i sapori.
I still remember fondly those days over twenty years ago when the Torta delle Rose was a true must among yeasted cakes. Making a brioche at home almost always meant choosing this one, with its inviting scent and elegant appearance that added a festive touch even to the simplest days. My mom, the people close to me, and I would always put in the effort to make it, as if it were a little ritual that brought everyone together. Today, however, the world of yeasted cakes has expanded so much: there are so many recipes and new ideas that every time we end up wanting to try something different.
However, when a dear friend asked me to make her Torta delle Rose, her favorite cake for the holidays, I couldn’t say no. It was the perfect opportunity to return to a flavor that had accompanied the most beautiful moments for years. Preparing it was like meeting an old friend again: comforting, familiar, full of memories.
Over the years, the recipe has transformed a bit, following our desire to improve. Today, I prefer longer rising times, less sugar, and fresh ingredients like homemade orange paste, which adds a wonderful fragrance. But the best part was sharing this experience with my daughter, who is the true expert in yeasted cakes at home. Together, we relied on the recipe of the maestro Iginio Massari, making little changes here and there to give it a personal touch.
And then, what about the moment of breakfast with the freshly baked Torta delle Rose? A real treat. Its softness is something unique: every slice feels like a cloud that melts in your mouth. The dough, slightly stringy, is a soft and enveloping hug. The filling is just sweet enough, with the butter blending with the fresh and intense fragrance of orange. Every bite is a celebration for the senses, a mix of warm fragrances that fill the house and the heart. And my friend's happiness when she tasted the cake was the cherry on top.
The History of the Torta delle Rose
The Torta delle Rose has ancient roots, born at the court of the Gonzagas of Mantua. Its shape — those little rolls of yeasted dough arranged like a bouquet of roses — was a tribute to beauty and elegance. It is said that it was created to celebrate the wedding of Isabella d'Este, a woman symbolizing refinement and culture.
The traditional recipe calls for a soft dough, similar to that of brioche, enriched with a filling of butter, sugar, and sometimes cream or jam. Once baked, the cake releases an irresistible fragrance, the kind that makes you want to eat it right away, while it’s still warm. The flavor? A perfect balance between the delicate sweetness of the filling and the golden fragrance of the dough, with that buttery touch that wins you over with the first bite.
A Timeless Cake
The Torta delle Rose is a classic that never goes out of style. No matter how many new sweets we try, it always remains special, capable of winning everyone over with its simplicity and authentic taste. Making it means carrying on a tradition and creating new memories to share with the people we love.
Schedule
Day 1
7:00 AM: First dough
11:00 AM: Second dough
3:00 PM: Third dough
7:00 PM: Fourth dough
Day 2
1:00 PM: Laminating and shaping
6:00 PM: Baking
Day 1
First Dough
4 g dry sourdough (or 8 g fresh yeast)
100 g strong flour (14% protein)
50–60 ml milk
Combine all ingredients and knead by hand to form a smooth and homogeneous dough (I used 60 ml of milk, but it depends on the absorbency of your flour).
Transfer the dough to a container and cover it with plastic wrap. Let it rise until doubled in size. I recommend placing it in the oven with the light on (at 22°C, this takes about 4 hours; at 26°C, 3 hours).
Second Dough
- all of the first dough
30 g eggs
50 g strong flour
Lightly beat the eggs with a fork, then mix them with the flour and the first dough.
Work the ingredients until the dough is smooth and homogeneous.
Let it rise in the oven with the light on until it triples in volume (this takes about 4 hours at 22°C, or 3 hours at 26°C).
Third Dough
- all of the second dough
20 g whole eggs
16 g egg yolks
15 g soft butter (pomade)
15 g sugar
50 g strong flour
Add all ingredients to the second dough and knead until smooth and homogeneous.
Let it rise until it triples in volume.
Fourth Dough
- all of the third dough
800 g strong flour
250 g whole eggs
150 g egg yolks
160 g sugar
120 g water
200 g cubed butter (2x2 cm)
12 g salt
40 g acacia honey
100 g orange paste (or candied orange peel blended with 1 tbsp water)
1 vanilla bean
Before starting
Prepare the aromatic mixture by mixing honey, orange paste, and vanilla bean (you can make this the day before). Store in a jar in the fridge; it lasts for a couple of weeks.
In a container, weigh the eggs and yolks, and lightly beat them with a fork to combine.
Weigh the sugar and salt, and cut the soft butter into cubes (it should be at room temperature).
Making the Dough
Add the third dough to the mixer, then add the flour, water (start with 100 g), and two-thirds of the beaten eggs. Set the mixer to a medium speed (no higher than 3).
Once everything is well incorporated, add the sugar and continue mixing.
After about 10 minutes, the dough will come together. When smooth, gradually add the remaining eggs in several batches.
When the dough is smooth and the gluten network has formed, add the aromatic mixture, followed by the cubed butter. Incorporate the butter one cube at a time, making sure each cube is fully absorbed before adding the next. I stop the machine occasionally to spread the butter directly on the dough to prevent it from sticking to the sides of the bowl.
Once all the butter is incorporated, increase the speed and continue until the dough pulls away from the sides of the bowl. Check the dough’s texture (with wet hands, stretch a piece of dough; if it doesn’t break, it's properly developed).
Transfer the dough to a lightly floured surface and shape it into a ball. Place it in an oiled container, seal with a lid, and let it rise for an hour in the oven with the light on (or at room temperature if it's warm). Then, place it in the fridge for a 15-16 hour maturation.
Day 2
For the Laminating
200–300 g soft butter
Sugar for dusting
Shaping and Forming
Take the dough out of the fridge and let it come to room temperature for about 30 minutes.
On a floured surface, roll out the dough into a large rectangle, about 1/2 cm thick.
Spread the soft butter evenly over the dough (I used about 28g, covering the entire surface).
Sprinkle the surface with sugar.
At this point, you can choose one of two options:
Roll up the dough along the longer side to create a long sausage, then cut 5 cm slices with a piece of string.
Cut the dough into 5 cm strips and roll each strip into a coil (this is the method I used).
Transfer the slices to two 22 cm diameter pans, placing them side by side. Cover with plastic wrap.
Place in the oven with the light on (using the proofing function, if your oven has one) at 26°–28°C until they double in size, which takes about 4–5 hours.
Baking
Bake at 170°C for 30–35 minutes for a 600 g batch. When the top is golden, cover with aluminum foil and continue baking until fully cooked.
Remove from the oven and let cool before dusting with powdered sugar.
Store in a food bag for up to a couple of days.
Before serving, warm the cake to fully appreciate its softness and flavors.
Holy moly, this looks beautiful and delicious 😋 Such a fascinating method too, I have never worked with multiple doughs in this way. I can imagine it makes the dough beautifully soft!
Fantascienza per me. MIIIi sei davvero molto brava!
👍🏻👌🏻👍🏻👌🏻